
Quick Answer: Soak 1–2 tablespoons of food-grade broccoli sprouting seeds in a quart mason jar for 8–12 hours, then drain and rinse with cool water 2–3 times daily. Keep the jar in a dark cupboard for days 1–4, then move it to bright indirect light for 12–24 hours to green the cotyledons. Harvest on days 3–7 when sprouts are 1–3 inches tall. The whole process takes less than a week — no soil, no garden, no complicated equipment required.
Learning how to grow broccoli sprouts is one of the most rewarding things you can do in a small kitchen. No garden, no grow lights, no complicated setup — just seeds, water, and a jar. Within a few days you’ll have a crop that rivals anything at a health food store, at a fraction of the cost.
What Are Broccoli Sprouts?
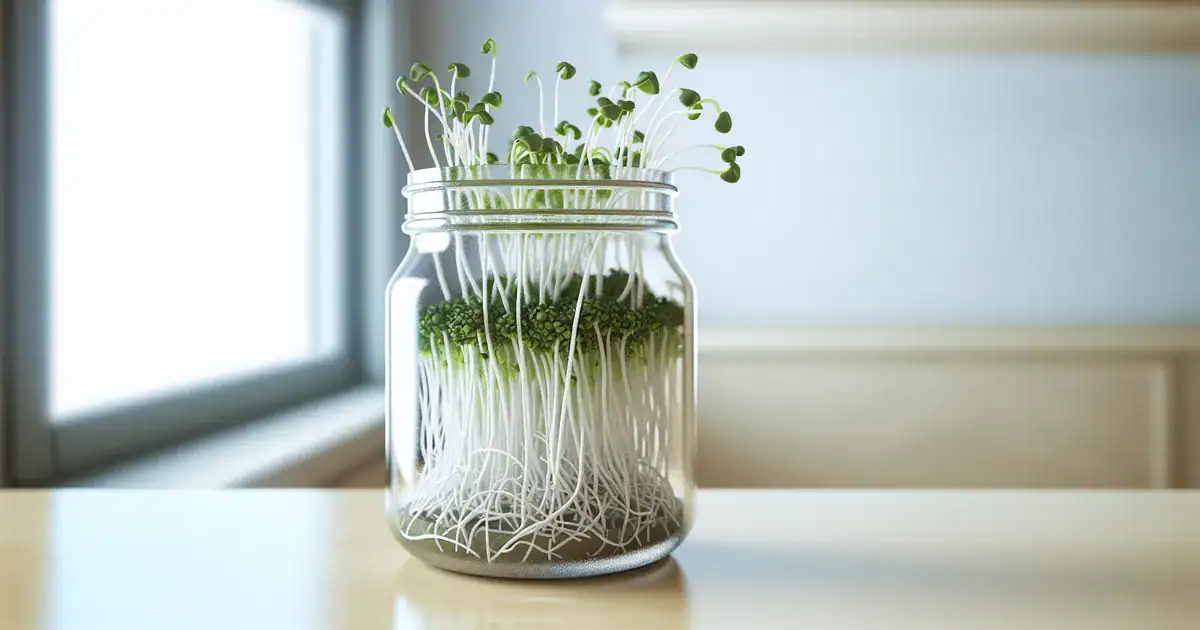
Broccoli sprouts are the seedling stage of Brassica oleracea — the same plant that gives us broccoli heads — harvested just 3–7 days after germination. What you’re eating are the cotyledons (seed leaves) and hypocotyl (stem), long before any true leaves develop.
The big nutritional story is sulforaphane, a compound in the glucosinolate family. Landmark research from Johns Hopkins University (Fahey et al., 1997) found that broccoli sprouts contain 10–100× more sulforaphane than mature broccoli heads. Sulforaphane peaks when cotyledons are fully open and just turning green — typically around days 3–5 — so harvesting at the right time genuinely matters.
Sprouts vs. microgreens: These two are often confused. Sprouts are grown without soil, harvested at the cotyledon stage, and eaten whole — roots and all. Microgreens are grown in soil or a growing medium, harvested slightly later when the first true leaves appear, and snipped at the stem. Both are nutritious, but sprouts are faster, cheaper, and require no growing medium.
What You Need to Grow Broccoli Sprouts
Seeds: The Most Important Decision You’ll Make
You need certified organic, food-grade sprouting seeds — look for cultivars like Calabrese or De Cicco, or seeds specifically labeled for sprouting. Reputable sprouting seed companies test their lots for Salmonella and E. coli, which matters when you’re eating something raw.
Never use seeds sold for garden planting. Agricultural seeds are routinely treated with fungicides like thiram or captan that are toxic when ingested. The packet may look similar, but the contents are not safe for sprouting.
Equipment
You don’t need much:
- Wide-mouth quart mason jar — the gold standard; easy to find, easy to clean
- Stainless steel mesh sprouting lid — fits standard mason jar bands; allows drainage and airflow
- Dish rack — for angling your jar at 45° during the drain phase
- Tiered sprouting trays — useful if you want to run multiple batches simultaneously
- Hemp sprouting bags — excellent airflow, great for travel or small spaces
A jar and a mesh lid is genuinely all you need to start. Cheesecloth secured with a rubber band works in a pinch, though it’s harder to rinse through cleanly.
Water Quality
Chlorine and chloramine in municipal tap water can slow germination by damaging seed coat cells. The fix is simple: use filtered water, or let tap water sit uncovered for 30–60 minutes before use. Aim for a pH of 6.5–7.5. Avoid distilled water for soaking — the complete absence of minerals creates an unfavorable osmotic environment for germination.
How to Grow Broccoli Sprouts: Step-by-Step
Step 1 — Soak Your Seeds (Day 0)
Add 1–2 tablespoons of dry seed to your quart jar. More than 2 tablespoons is a common beginner mistake — seeds expand 6–8× their dry volume, and overcrowding is the fastest route to failure. Cover with 3× the volume of filtered water and soak for 8–12 hours. Overnight works perfectly. Don’t exceed 12 hours; over-soaking depletes oxygen and encourages anaerobic bacteria.
Step 2 — Drain and Set Up (Day 1)
After soaking, drain the water completely through your mesh lid, rinse once with cool water (65–70°F), and drain again. Angle the jar at 45° in a dish rack — mouth facing down — so residual water drains out and air can circulate. This is where your jar will live between rinses for the entire cycle.
Step 3 — The Dark Germination Phase (Days 1–4)
Rinse with cool water 2–3 times daily — morning, midday, and evening works well. After each rinse, drain completely and return the jar to its angled position. Keep it in a dark cupboard or cover with a breathable cloth. Darkness mimics underground germination conditions and prevents the sprouts from greening too early.
What to expect each day:
– Day 1: Seeds swell; tiny white tails emerge
– Day 2: Roots lengthen to ¼–½ inch; fine white fuzz appears (root hairs — totally normal)
– Day 3: Sprouts reach ½–1 inch; cotyledons begin to separate
– Day 4: Sprouts 1–2 inches tall; cotyledons are open but still pale yellow
Step 4 — The Greening Phase (Days 4–5)
Move the jar to bright indirect light (around 500–1,000 foot-candles) for 12–24 hours. A bright windowsill away from direct sun is ideal. This triggers chlorophyll synthesis, turning pale yellow cotyledons a vibrant green. Don’t skip this step — it’s when sulforaphane content peaks and the flavor shifts from bland to pleasantly peppery.
Step 5 — Harvest (Days 3–7)
Harvest when cotyledons are fully open, bright green, and sprouts are 1–3 inches tall. Taste-test from day 3 onward — you’re looking for a fresh, mildly peppery flavor with no bitterness or off-notes. One tablespoon of dry seed yields roughly 1–1.5 cups of finished sprouts. Give them a final rinse, then move straight to drying and storage.
Troubleshooting Common Problems
White Fuzz: Mold or Root Hairs?
This is the question that sends most new sprouters into a panic — and usually the answer is good news. Root hairs are a completely normal part of root development. They look like fine, uniform, translucent fuzz radiating from the root tip, and they disappear after rinsing.
True mold is irregular and clumping, often colored (white, grey, or green), and persists after rinsing. If you’re unsure, rinse thoroughly and check again in an hour. Root hairs — gone. Mold — still there.
Slimy or Foul-Smelling Sprouts
Don’t taste-test. Don’t rinse and hope. Discard the batch immediately. Slimy sprouts with a sulfurous or sour smell indicate bacterial contamination — potentially Salmonella, E. coli, or Listeria — and rinsing will not make them safe.
After discarding, sanitize your jar and lid with a dilute bleach solution (1 tablespoon unscented bleach per gallon of water), rinse thoroughly, and air dry. For your next batch, consider a seed sanitation step: soak seeds in a 3% hydrogen peroxide solution diluted 1:16 with water for 5 minutes, then rinse well before your regular soak.
Poor or Uneven Germination
Old seeds, incorrect water temperature, and over-soaking are the most common culprits. Test seed viability first: place 10 seeds on a damp paper towel, fold it over, and check after 48 hours. Good sprouting seeds should show ≥85% germination. Below 65°F, germination slows dramatically — a seedling heat mat set to 70°F solves this in winter.
Leggy or Pale Sprouts
Long, spindly, pale sprouts are a sign of incomplete greening, not a germination problem. Make sure you complete the greening phase on days 4–5 with 12–24 hours of bright indirect light. If sprouts are still pale after that, try a brighter windowsill or a brief session under a low-intensity grow lamp.
Clumping or Rot in the Center
Almost always an overcrowding problem. Too many seeds create pockets of trapped moisture and restricted airflow — ideal conditions for rot. Stick to 1–2 tablespoons of dry seed per quart jar, ensure the jar drains fully after every rinse, and confirm it sits at a proper 45° angle between rinses.
Storing Broccoli Sprouts After Harvest
After the final rinse, drain thoroughly and spread sprouts on a clean kitchen towel for 15–30 minutes. This step is easy to skip and costly to ignore — excess surface moisture is the primary driver of sliminess in stored sprouts.
Store dried sprouts in an airtight container lined with a dry paper towel, which absorbs condensation. Keep them at 34–38°F (1–3°C) — the coldest part of your fridge without freezing. Properly dried and refrigerated sprouts stay fresh for 5–7 days, though flavor and sulforaphane content are best in the first 3–4 days. If they smell sulfurous or feel slimy before that window closes, discard them.
Tips for Consistent Results
Stick to a rinsing schedule. Set phone alarms if you need to. A consistent 2–3× daily rinse is the single most important habit for healthy sprouts. Skipping even one rinse on a warm day can tip the balance toward bacterial growth.
Sanitize between every batch. Biofilms — invisible layers of bacteria — form on jar surfaces and mesh lids after each use. Hot soapy water followed by a dilute bleach rinse between batches keeps these from becoming a recurring problem.
Adjust for the season. In summer, move jars to the coolest room in your home, rinse with slightly cooler water (60–65°F), and check sprouts from day 3 — warm temperatures accelerate the cycle. If your home consistently exceeds 80°F, refrigerate jars between rinses. In winter, a seedling heat mat at 70°F under your jars solves slow germination, and letting rinse water reach room temperature before use prevents cold shock.
Run overlapping batches. Start a new jar every 1–2 days so you always have one finishing, one mid-cycle, and one just starting. This “sprouting conveyor belt” gives you a steady supply without the feast-or-famine cycle of single-batch growing. Store dry seeds in an airtight container at 50–60°F and use within 1–2 years of purchase.
Frequently Asked Questions
How long does it take to grow broccoli sprouts?
Most batches are ready in 3–7 days from the initial soak, with days 4–5 being the sweet spot for most growers. Warmer rooms speed the cycle; cooler rooms slow it down.
What is the white fuzz on my broccoli sprouts?
Almost certainly root hairs — a normal, healthy part of germination. Rinse your sprouts thoroughly. Root hairs disappear with rinsing; mold persists and tends to clump irregularly. If it’s gone after rinsing, you’re fine.
Why do my broccoli sprouts smell bad?
A sulfurous or sour smell means bacterial contamination. Discard the batch immediately, sanitize your equipment with a dilute bleach solution, and consider a hydrogen peroxide seed soak (3% H₂O₂ diluted 1:16 with water, 5 minutes) before your next batch.
How do I know when broccoli sprouts are ready to harvest?
Look for cotyledons that are fully open and bright green after their light exposure, with sprouts reaching 1–3 inches tall. Taste from day 3 onward — ready sprouts are fresh and mildly peppery. Bitter or flat flavor means another 12–24 hours will help.
Can broccoli sprouts cause food poisoning?
Yes, if food safety steps aren’t followed. The FDA has documented outbreaks linked to raw sprouts contaminated with Salmonella and E. coli. The risk drops significantly when you source pathogen-tested seeds, rinse 2–3 times daily, ensure complete drainage, and store correctly. People who are immunocompromised, pregnant, elderly, or very young should consult a healthcare provider before eating raw sprouts regularly.
2. **Stainless steel mesh sprouting lid** — placed in the Equipment list alongside the mason jar recommendation.3. **Tiered sprouting tray system** — placed in the Equipment list for multi-batch growers.4. **Hemp sprouting bags** — retained in Equipment list as a natural mention (no comment needed; product category named in prose).`
5. **Countertop water filter pitcher** — placed at the end of the Water Quality subsection.
Completeness
- FAQ section retains all 5 original questions with concise answers — within the 3–5 question requirement.
Removed Content
- Standalone “Myths” section (content redistributed to Troubleshooting and Tips sections).
- “Why Grow Them?” / benefits framing (keyword did not request it; sulforaphane info retained in What Are Broccoli Sprouts section).
- Redundant restatements of the root hair explanation (appeared in both Troubleshooting and Myths; consolidated to one clear explanation in Troubleshooting).
- No bracketed … placeholders were present in the original; the one existing affiliate comment was retained and four new ones added.
–>