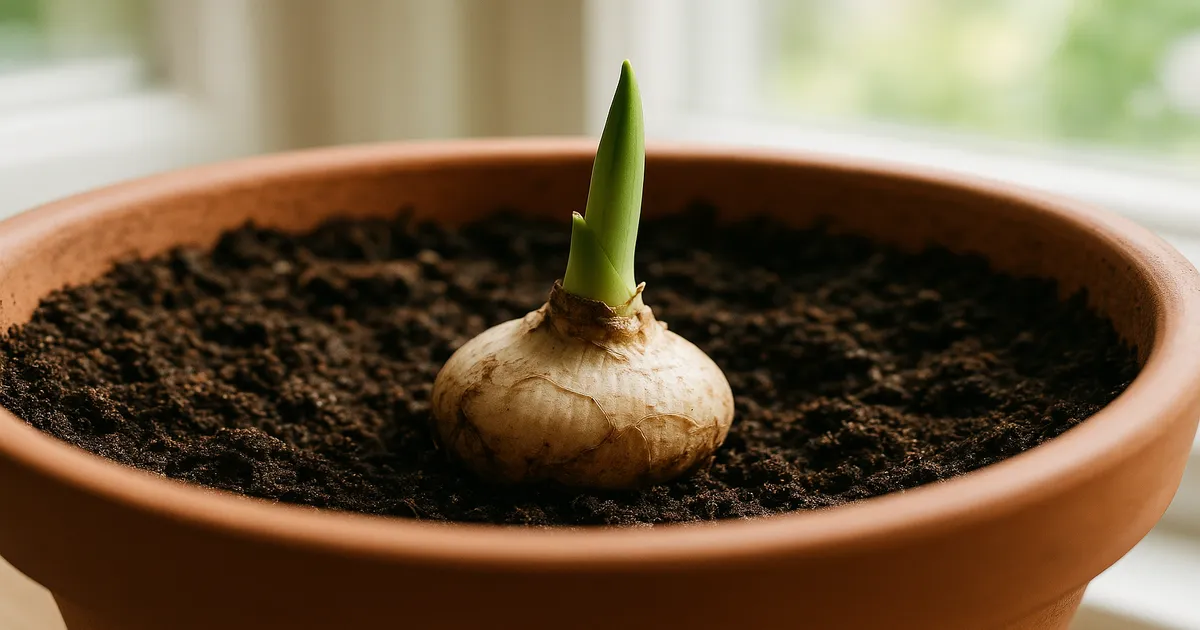
Quick Answer: Those tiny jumping creatures on your Alocasia corm are almost certainly springtails — harmless decomposers that thrive in the moist, organic-rich soil Alocasia needs. They don’t eat living plant tissue and rarely require elimination. That said, root mealybugs, fungus gnat larvae, mold mites, and fungal growth can all look similar and carry real risks, so correct identification matters before you do anything.
If you’ve just unpotted your Alocasia and found yourself Googling “what are these on my Alocasia corm? are they springtails?” — you’re in the right place. The corm (that chunky, potato-like storage organ at the base of your plant) is a magnet for soil organisms. The conditions Alocasia demands — warmth, humidity, rich organic soil — are precisely what many of those organisms love too. Most of the time what you’re seeing is harmless. Sometimes it isn’t. Here’s how to tell the difference.
Identifying Springtails on Your Alocasia Corm
What Springtails Look Like
Springtails (Order Collembola) are tiny — usually 1–2 mm — and white, cream, or faintly translucent. Their bodies are teardrop-shaped or slightly elongated depending on species. Folsomia candida is the classic white houseplant springtail; Entomobrya spp. are more elongated; Hypogastrura spp. tend to be darker and live right at the soil surface. You’ll often spot them in loose clusters on moist soil or directly on the corm.
The Telltale Jump
This is your fastest diagnostic tool. Tap the pot or blow lightly across the soil surface. Springtails launch themselves using a forked appendage called the furcula, tucked under the abdomen like a spring-loaded lever. The result is erratic and unmistakable: tiny white specks scattering in all directions at once. Nothing else you’re likely to find on an Alocasia corm moves quite like this.
Why They’re There
Springtails are saprophagous — they feed on fungi, algae, and decaying organic matter, not living plant tissue. Their presence signals moist, organically rich conditions rather than a pest problem. In moderate numbers they’re actually beneficial, helping regulate fungal growth in the soil. Only in extremely large populations might they occasionally disturb fine root hairs, and even then, damage is minor.
What Are These on My Alocasia Corm If They’re Not Springtails?
Not everything small and white in your soil is a springtail. Here are the most common look-alikes, ranked by how much trouble they cause.
Fungus Gnat Larvae: The Wrigglers That Cause Real Damage
Fungus gnat larvae (Bradysia spp.) are 4–6 mm, translucent white with a shiny black head capsule. They wriggle — they do not jump. You’ll find them in the top 2–5 cm of soil and around the corm surface. Unlike springtails, these are a genuine threat: they tunnel into soft corm tissue and create entry points for Pythium, Fusarium, and Rhizoctonia pathogens. If you see wriggling larvae near your corm, treat promptly.
Root Mealybugs: Slow-Moving and Dangerous
Root mealybugs (Rhizoecus spp., Geococcus spp.) are 1–3 mm, oval, and covered in a white waxy or cottony coating. They don’t jump and move only very slowly. You’ll often find them clustered at root junctions or on the corm itself, sometimes leaving a powdery white residue. They’re sap-suckers that pierce plant tissue directly, causing stunted growth, yellowing, and — if left unchecked — corm rot. They’re also stubbornly difficult to eliminate.
Mold Mites and Grain Mites: Moving White Dust
Tyrophagus putrescentiae and related mites are tiny — 0.2–0.5 mm — and appear as a shimmering, moving white dust on the corm surface. They don’t jump. They thrive when humidity exceeds 70% and temperatures climb above 25°C (77°F). A severe infestation can stress corm tissue, but they’re mostly a symptom of excess moisture rather than a primary threat.
Beneficial Soil Mites: Leave These Alone
Oribatid and predatory mesostigmatid mites are 0.3–1 mm, round to oval, and brown or tan. They move steadily — no jumping, no wriggling. These are allies. Predatory mites actively hunt fungus gnat larvae and are used commercially as biocontrol agents. Slow-moving brown specks that don’t match any pest description? Leave them.
Fungal Mycelium: White Threads That Don’t Move
White, thread-like, cobweb-textured growth on or around the corm is fungal mycelium — and it’s completely stationary. Saprophytic fungi that break down organic matter in the potting mix are generally neutral to beneficial. Pythium and Fusarium, however, cause wet rot and dry rot respectively. The warning signs are soft or discolored corm tissue and a musty, sour, or foul odor. If the corm is still firm and smells starchy, the mycelium is likely saprophytic and low-risk.
Quick Comparison: What’s on Your Corm?
| Organism | Size | Color | Movement | Harm Level |
|---|---|---|---|---|
| Springtails | 1–2 mm | White/cream | Jumping leaps | Beneficial–Harmless |
| Fungus gnat larvae | 4–6 mm | Translucent, black head | Wriggling | Moderate–High |
| Root mealybugs | 1–3 mm | White, waxy/cottony | Very slow crawl | High |
| Mold/grain mites | 0.2–0.5 mm | White “dust” | Slow crawl | Low–Moderate |
| Soil mites (beneficial) | 0.3–1 mm | Brown/tan | Steady crawl | Beneficial |
| Fungal mycelium | Thread-like | White | None | Neutral–Very High |
| Isopods | 5–15 mm | Gray, segmented | Walking/rolling | Low |
How to Treat What You Find
Managing Springtails: Usually, Just Leave Them
A moderate springtail population is doing useful work. If numbers are high and you want to reduce them, the most effective approach is also the simplest: let the top 3–5 cm of soil dry out between waterings. Springtails can’t survive dry conditions and will die off or retreat deeper.
For a surface barrier, top-dress with a 1–2 cm layer of coarse horticultural sand or perlite — this creates a dry zone adults dislike. If you want full elimination before propagating the corm, soak the bare corm in a 3% hydrogen peroxide solution diluted 1:4 with water for 5–10 minutes, then repot into fresh sterile mix.
Eliminating Fungus Gnat Larvae
- Apply a Bacillus thuringiensis var. israelensis (Bti) soil drench — a biological larvicide that targets dipteran larvae without harming beneficial organisms (Gnatrol WDG Bti) — every 7–10 days for 3–4 cycles.
- Follow up with beneficial nematodes (Steinernema feltiae) as a soil drench when soil temperature is above 10°C (50°F).
- Place yellow sticky traps at soil level to catch emerging adults and track population trends.
- Let the top 5 cm of soil dry completely between waterings — larvae cannot survive dry soil.
For severe infestations, do a full repot. Remove all old soil, inspect and clean the corm, trim any soft or damaged tissue with a sterile blade, and dust cut surfaces with powdered sulfur before repotting into fresh mix.
Treating Root Mealybugs
Root mealybugs are serious. Don’t half-treat them.
- Remove the plant from its pot and shake off all old soil.
- Rinse the roots and corm thoroughly under lukewarm running water.
- Inspect with a magnifying glass. Use a soft brush or cotton swab dipped in 70% isopropyl alcohol to manually remove every visible mealybug.
- Soak the bare root system and corm in a neem oil-based insecticidal soap solution for 10–15 minutes.
- Repot into completely fresh, sterile potting mix in a clean or sterilized pot.
- Drench the new soil with a spinosad-based insecticide (Monterey Garden Insect Spray) every 10–14 days for at least 3 cycles. Reserve imidacloprid-based systemics for the most severe cases — effective but carries environmental concerns as a neonicotinoid.
- Quarantine the plant immediately to prevent spread to neighboring houseplants.
Dealing with Corm Rot (Pythium, Fusarium, Rhizoctonia)
Act fast — Pythium in particular can destroy a corm within days.
- Remove the plant and examine the corm fully.
- Cut away all soft, mushy, brown, or discolored tissue with a sterile blade, sterilizing between cuts with 70% isopropyl alcohol. Healthy tissue is firm, white to cream, and smells starchy.
- Dust all cut surfaces with powdered sulfur or a copper-based fungicide powder.
- Air-dry the corm in a warm, well-ventilated spot for 24–48 hours to form a callus.
- For Pythium specifically, apply a phosphonate-based fungicide (potassium phosphonate) as a drench after repotting — phosphonates are uniquely effective against oomycetes.
- Repot into sterile, well-draining mix in a clean pot with excellent drainage.
- Withhold water for 3–5 days to let wounds finish healing.
Prevention: Keeping Corm Problems From Starting
The Right Potting Mix
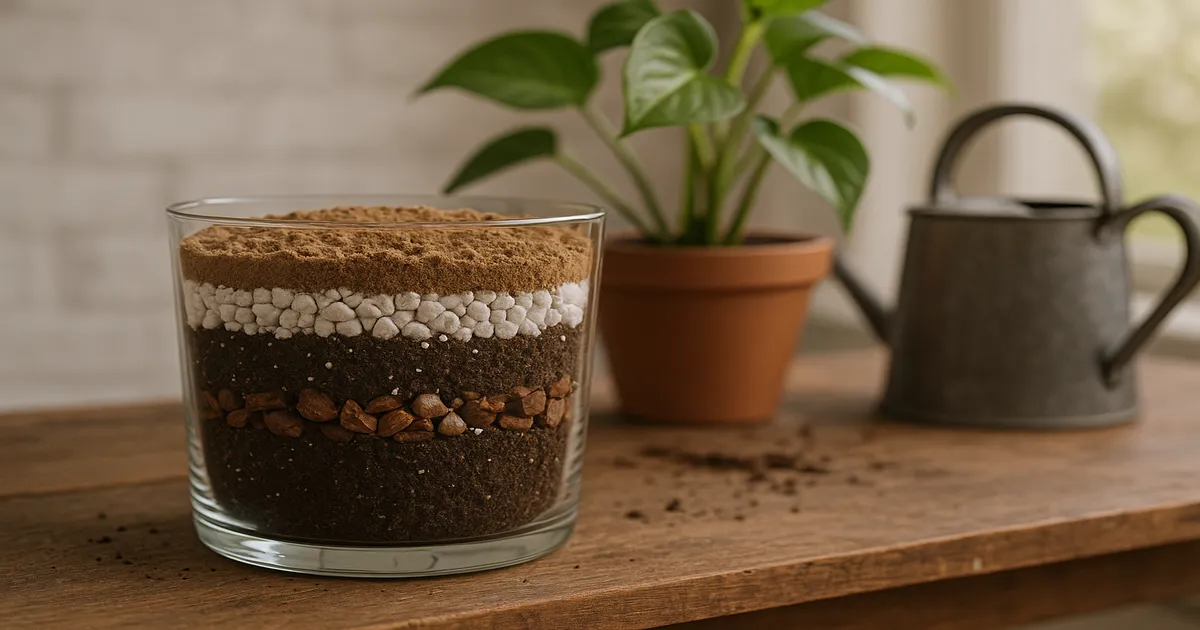
Fast-draining and breathable is the goal — something that mimics the rich but well-aerated forest floor of Alocasia’s native tropical habitat. A solid starting ratio:
- 40% high-quality potting mix (Fox Farm Ocean Forest)
- 30% perlite or pumice
- 20% medium-grade orchid bark
- 10% worm castings or compost
Target a soil pH of 5.5–6.5. Avoid mixes heavy in peat moss, which compacts and retains too much water over time — coco coir is a more sustainable alternative with better long-term aeration. Never use garden soil in containers; it compacts, drains poorly, and imports pathogens.
Watering Practices That Discourage Pests
Water only when the top 3–5 cm of soil is dry to the touch. A soil moisture meter takes the guesswork out of this — aim for a reading of 3–4 on a standard 1–10 scale before watering. When you do water, go thoroughly until water runs freely from the drainage holes, then empty the saucer within 30 minutes. Standing water is an open invitation to fungus gnats and rot.
Avoid misting the soil surface — it creates ideal conditions for fungus gnats and mold without meaningfully benefiting the plant.
Pot Choice
Multiple drainage holes are non-negotiable. Terracotta pots are an excellent choice for Alocasia: the porous walls allow soil to breathe and excess moisture to evaporate, naturally discouraging the wet conditions that attract soil pests.
Inspecting the Corm When You Repot
Repotting is often the moment people first discover what’s living in their Alocasia’s soil — and it’s your best opportunity to assess corm health directly. Repot when roots circle the drainage holes, when soil stays wet far longer than it used to, or when the plant declines despite correct watering and light.
Remove the plant and gently shake off old soil. Rinse the corm and roots under lukewarm water, then inspect closely — a magnifying glass helps. For general sanitation, a 5–10 minute soak in hydrogen peroxide solution (3% diluted 1:4) will surface-sterilize the corm and kill most incidental organisms without harming healthy tissue. Let it air-dry briefly before repotting.
A healthy corm is firm, white to cream-colored, and smells clean and starchy — like a raw potato. An unhealthy corm is soft, brown or gray, mushy in places, and often has a foul or sour odor. Any soft tissue needs to come off before repotting, with cut surfaces treated and allowed to callus as described above.
Frequently Asked Questions
Are springtails harmful to Alocasia plants?
No. Springtails feed on fungi, algae, and decaying organic matter — not living plant tissue. In very large populations they might occasionally disturb fine root hairs, but genuine damage is extremely rare. Most growers can safely leave them alone.
How do I tell the difference between springtails and fungus gnat larvae?
Size and movement. Springtails are tiny (1–2 mm), white, and jump erratically when disturbed. Fungus gnat larvae are larger (4–6 mm), translucent with a visible black head capsule, and wriggle rather than jump. If what you’re seeing doesn’t jump, it’s probably not a springtail.
Should I remove springtails from my Alocasia pot?
Usually not. They’re beneficial decomposers that help regulate fungal growth, and their presence doesn’t indicate a problem. If populations are very large, allowing the soil to dry more between waterings will reduce their numbers naturally — no chemicals needed.
What are the white fuzzy things growing on my Alocasia corm?
White fuzzy or thread-like growth that doesn’t move is almost certainly fungal mycelium. If the corm tissue is still firm, smells starchy, and shows no soft or discolored areas, the mycelium is likely saprophytic — a harmless decomposer working on organic matter in the potting mix. If the corm feels soft or smells foul, treat it as rot immediately and follow the corm rot protocol above.
Can I use hydrogen peroxide to clean my Alocasia corm?
Yes, carefully. A solution of 3% hydrogen peroxide diluted 1:4 with water is safe for a 5–10 minute soak. It kills surface organisms and fungal spores without damaging healthy corm tissue. Don’t use undiluted hydrogen peroxide — concentrations above 3% can cause chemical burns to plant tissue.