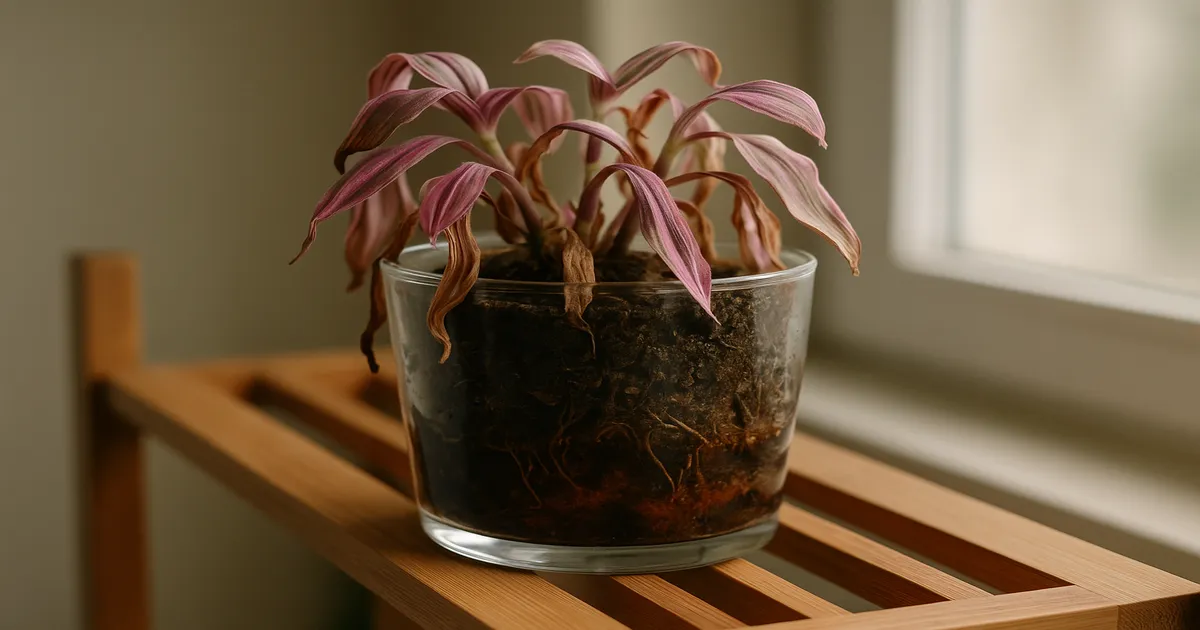
Quick Answer: The most common reasons a Tradescantia Nanouk is dying are overwatering and root rot, insufficient light, or a combination of environmental stressors like low humidity and temperature swings. Because Nanouk’s heavy variegation means it has less chlorophyll than solid-green plants, it needs more light than you might expect — and its thick stems can hide root rot until the damage is already advanced. The good news: most causes are reversible if you catch them early and address the root problem directly.
If you’re asking “why is my Tradescantia Nanouk dying?”, you’re already ahead of most plant owners — noticing the decline early is half the battle. This guide walks through every major cause, how to tell them apart, and exactly what to do about each one.
Overwatering and Root Rot: The Number One Killer
More Nanouks die from too much water than from anything else. The plant’s thick, waxy stems give it a deceptively sturdy appearance, so it’s easy to keep watering on schedule even when the soil is still saturated from the last session.
How to Identify Root Rot in Tradescantia Nanouk
When soil stays waterlogged, it becomes anaerobic — oxygen is pushed out, roots suffocate, and fungal pathogens like Pythium, Phytophthora, and Fusarium move in fast. The plant paradoxically wilts despite sitting in wet soil because damaged roots can no longer transport water upward.
Look for these warning signs:
- Mushy, yellowing, or translucent lower leaves
- Stems that feel soft or hollow near the soil line
- A sour, musty, or sulfurous smell from the pot
- Brown, slimy roots (healthy roots are white to pale tan and firm)
- Wilting that doesn’t improve after watering
Several factors accelerate root rot: pots without drainage holes, dense or peat-heavy soil, low light (the plant drinks water more slowly in dim conditions), cool room temperatures, and oversized pots that hold far more moisture than the root ball can use.
Step-by-Step Fix: Saving an Overwatered Nanouk
Act quickly — root rot spreads fast.
- Unpot the plant and inspect every root. Trim all brown, mushy sections with sterile scissors.
- Treat the remaining roots by dusting cut surfaces with cinnamon (a natural antifungal) or drenching with a diluted hydrogen peroxide solution (3% H₂O₂ mixed 1:4 with water).
- Repot into fresh, dry mix — don’t reuse the old soil.
- Withhold water for 3–5 days to let cut root ends callous before resuming a careful watering routine.
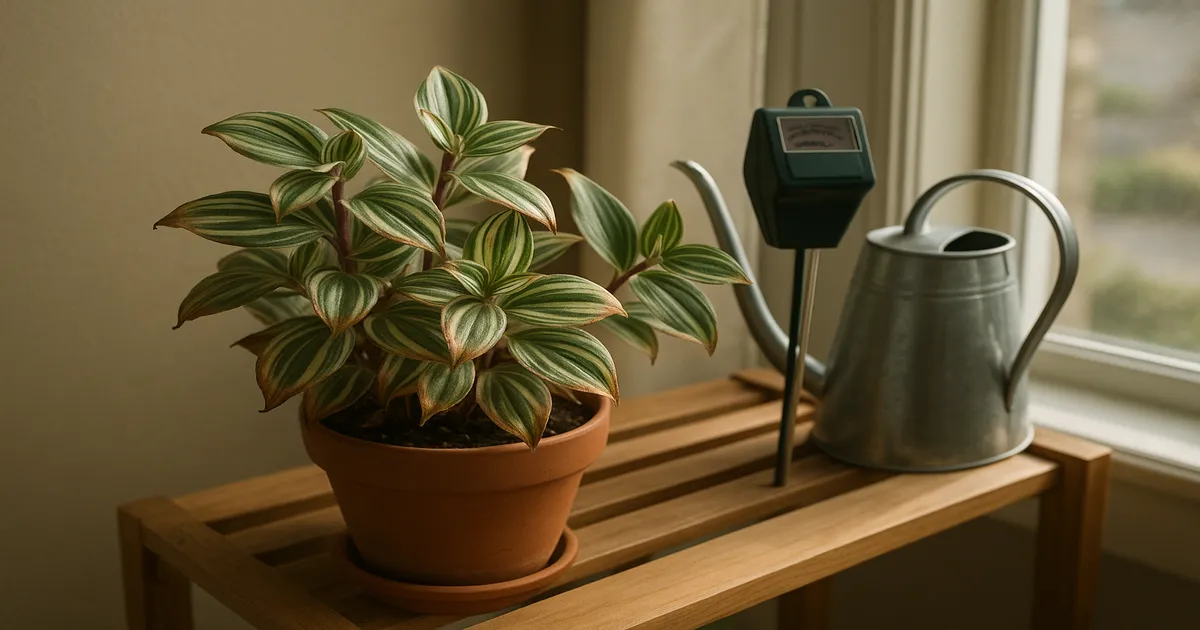
- Water only when the top 1–2 inches of soil are dry — use your finger or a moisture meter to check rather than guessing. A reliable option is the XLUX Soil Moisture Meter, which takes the guesswork out of watering.
Best Soil Mix and Pot Choice to Prevent Root Rot
Standard potting mix straight from the bag holds too much moisture for Nanouk. Instead, blend:
- 50% quality all-purpose potting mix — Fox Farm Ocean Forest works well here
- 30% perlite
- 20% orchid bark or coarse pumice
A terracotta pot with drainage holes is the best choice; the porous walls wick away excess moisture passively. Size matters too — choose a pot only 1–2 inches larger in diameter than the current root ball.
Insufficient Light: A Leading Cause of Tradescantia Nanouk Decline
Many plant owners assume Nanouk is a typical low-light trailer. It isn’t. That gorgeous pink-and-purple variegation comes at a cost: less chlorophyll, which means the plant must work harder to photosynthesize at the same light level as a solid-green species.
Signs Your Nanouk Is Not Getting Enough Light
Nanouk needs bright indirect light — roughly 1,500–3,000 foot-candles — to thrive. In lower light, photosynthesis slows, healthy tissue growth stalls, and the plant compensates in visible ways:
- Fading variegation — pink and purple tones wash out as the plant produces more chlorophyll to compensate
- Etiolation — long, spindly stems reaching toward the nearest light source
- Smaller new leaves compared to older growth
- Stalled or very slow growth overall
- Increased overwatering risk, because a plant in low light drinks water far more slowly
How to Fix Low Light
Move the plant to within 2–3 feet of a south- or west-facing window. An east-facing window works well too — the gentle morning sun is bright enough without being harsh. Rotate the pot 90° every one to two weeks so all sides receive even exposure.
If natural light is limited, a full-spectrum LED grow light placed 6–12 inches above the plant for 12–14 hours per day will do the job reliably. The Barrina Full Spectrum LED Grow Light is a popular, affordable option for this.
One caution: harsh midday direct sun above 5,000 foot-candles bleaches and scorches the leaves. Bright and indirect is the sweet spot.
Underwatering, Temperature Stress, and Low Humidity
These three stressors are distinct problems, but they often appear together — especially in winter — and their symptoms overlap enough to address as a group.
How to Tell If Your Nanouk Is Underwatered
Underwatering causes crispy, dry leaf tips that progress inward, leaves curling toward the center, soil pulling away from the pot edges, and a noticeably lightweight pot when lifted. Colors look dull rather than vibrant. The key distinction from overwatering: the soil is bone dry and crumbly, not wet or soggy.
Fix it with bottom-watering — set the pot in a basin of room-temperature water for 20–30 minutes and let the soil absorb moisture from below. Then switch to a moisture-based watering schedule rather than a fixed calendar interval.
Cold Drafts and Temperature Damage
Nanouk’s comfort zone is 60–80°F (15–27°C). Below 50°F (10°C), chilling injury begins: you’ll see water-soaked or glassy patches on leaves, blackening of stem tissue, or sudden collapse. Common culprits are air conditioning vents, cold windowsills in winter, and exterior doors that let in blasts of cold air.
Keep the plant at least 3–4 feet from any draft source. If cold damage has already occurred, remove the affected tissue, hold back on watering while the plant stabilizes, and move it somewhere consistently warm.
Raising Humidity for a Healthier Nanouk
Nanouk prefers relative humidity of 50–70%. Winter heating systems can drop indoor humidity to 20–30%, which pulls moisture out of leaf margins faster than roots can replace it — resulting in brown, crispy tips even when the soil is perfectly moist.
The most effective fix is a small humidifier placed near the plant. The Levoit Classic 300S is a well-regarded option that’s easy to maintain. A pebble tray adds a modest 5–10% RH boost and works as a useful supplement. Grouping plants together also raises local humidity through collective transpiration. Avoid misting directly onto leaves — it raises humidity for only a few minutes and leaves foliage wet, which invites fungal leaf spot.
Common Pests Attacking Tradescantia Nanouk
Pests are sneaky. By the time you notice visible damage, an infestation is usually already established. Check the undersides of leaves and leaf axils every time you water.
Spider mites thrive in hot, dry conditions — exactly what many homes create in winter with the heating running. They pierce leaf cells and drain the contents, leaving stippled, bronzed, or silvery foliage and fine webbing between stems. Increase humidity immediately, then spray the entire plant with insecticidal soap or diluted neem oil every 5–7 days for three to four treatment cycles. Wiping leaf surfaces with a damp cloth removes mites and eggs physically.
Other common pests to watch for:
- Fungus gnats: Adults are harmless, but their larvae chew fine roots in moist soil. Let the soil dry out more between waterings, apply a Bacillus thuringiensis var. israelensis (Bti) biological drench, and use yellow sticky traps for adults. A sand or gravel top-dressing discourages egg-laying.
- Mealybugs: Look for white cottony masses in leaf axils. Dab individual bugs with a cotton swab soaked in 70% isopropyl alcohol, then follow up with a neem oil spray weekly for four to six weeks.
- Aphids: Clusters on new growth and sticky honeydew residue are the giveaway. Knock them off with a strong water stream, then apply insecticidal soap every five to seven days.
- Scale: Brown bumps on stems that don’t wipe off easily. Scrape them off manually, then apply horticultural oil to smother any remaining insects.
All sap-sucking insects reduce photosynthetic capacity and mimic nutrient deficiency symptoms — so don’t assume fertilizer will fix a pest problem. Repeat treatment cycles are essential; a single application rarely eliminates an infestation. Quarantine new plants for two weeks before placing them near your Nanouk.
Nutrient Deficiency and Fertilizer Burn
After six to twelve months in the same potting mix, nutrients deplete. Nitrogen deficiency shows up as pale yellowing of older leaves and stunted growth. Interveinal chlorosis — yellowing between leaf veins while the veins stay green — often signals iron or manganese lockout caused by soil pH above 7.0, rather than a true absence of those minerals. Test soil pH and aim to keep it between 5.5 and 6.5.
Over-fertilizing is the flip side of the problem. Excess soluble salts accumulate in the soil and draw water out of roots via osmosis, producing symptoms that look like drought stress: brown leaf tips and margins, wilting despite moist soil, and white crusty deposits on the soil surface or pot edges. Fix it by flushing the soil two to three times — run water through until it drains freely from the bottom — then withhold fertilizer for four to six weeks. If the buildup is severe, repot into fresh mix.
For routine feeding, use a balanced 10-10-10 or 20-20-20 NPK liquid fertilizer at half the recommended strength every two to four weeks during spring and summer. Jack’s Classic All Purpose 20-20-20 is a reliable choice that’s easy to dilute accurately. Reduce or stop feeding in autumn and winter when growth naturally slows.
Leggy Growth, Aging Stems, and Repotting
Bare, woody lower stems with leaves only at the tips are normal — it’s how Tradescantia ages. This is senescence, not death, and it doesn’t mean your plant is failing. Prune stems back by one-third to one-half to encourage bushy regrowth. Better yet, take healthy tip cuttings, root them in water or moist soil, and use them to refresh the mother plant or start new ones.
Repot every one to two years, or when roots begin circling the bottom of the pot or emerging from drainage holes. Spring is the ideal time. For the best mix, combine 50% all-purpose potting mix, 25% perlite or pumice, 15% fine orchid bark, and 10% horticultural charcoal (optional, but it improves drainage and reduces bacterial buildup). Always choose a pot only 1–2 inches larger in diameter than the current root ball — going too big invites the overwatering problems covered earlier.
How to Revive a Dying Tradescantia Nanouk: Action Plan
Step 1: Diagnose Before You Act
Don’t guess — observe first. Ask yourself:
- Is the soil wet or dry right now?
- Are the leaves yellowing, crisping, going limp, or fading in color?
- Do you see pests, webbing, or sticky residue?
- How much light does the plant actually receive each day?
- Has it been exposed to cold drafts or sudden temperature swings?
Match what you see to the causes above before doing anything. A misdiagnosis — like watering an already overwatered plant because the leaves are wilting — makes things significantly worse.
Step 2: Address the Root Cause First
Implement one targeted fix at a time. If you repot, adjust humidity, and change the light all in the same week, you won’t know what worked. Address the most urgent issue first (root rot if present, then light, then environment), and give the plant one to two weeks to respond before making additional changes.
Step 3: Maintain Consistent Care Going Forward
Once the plant stabilizes, a consistent routine is your best prevention:
- Water when the top 1–2 inches of soil are dry
- Light: bright indirect light, 1,500–3,000 foot-candles
- Temperature: 60–80°F, away from all drafts
- Humidity: 50–70% RH — use a humidifier in winter
- Fertilize at half strength every 2–4 weeks in spring and summer only
- Repot every 1–2 years into fresh, well-draining mix
- Inspect for pests every time you water
Frequently Asked Questions: Why Is My Tradescantia Nanouk Dying?
Why are my Tradescantia Nanouk leaves turning yellow?
Yellowing leaves most commonly point to overwatering or root rot — especially if the soil is wet and lower leaves are affected first. It can also indicate nitrogen deficiency after months in depleted soil, or a pest infestation mimicking nutrient stress. Check soil moisture first: if it’s soggy, root rot is the likely culprit. If the soil is fine, assess light levels and feeding history before doing anything else.
Why is my Tradescantia Nanouk losing its pink and purple color?
Color loss almost always means insufficient light. Nanouk’s variegation requires bright indirect light to stay vibrant; in lower light, the plant compensates by producing more chlorophyll, which overwhelms the pink and purple pigments. Move the plant closer to a bright window or add a grow light, and color typically returns within a few weeks of new growth emerging.
How do I know if my Tradescantia Nanouk has root rot?
Unpot the plant and look at the roots directly — it’s the only reliable way to confirm root rot. Healthy roots are white to pale tan and firm; rotted roots are brown or black, slimy, and may smell sour or musty. Above the soil, symptoms include soft stems near the base, yellowing lower leaves, and wilting that doesn’t improve after watering.
How often should I water Tradescantia Nanouk?
Water when the top 1–2 inches of soil feel dry to the touch — typically every seven to ten days in spring and summer, and every two weeks or more in autumn and winter. Don’t follow a fixed calendar schedule; let the soil dictate timing. Pot size, light level, temperature, and humidity all affect how quickly the soil dries out.
Can a dying Tradescantia Nanouk be saved?
Yes, in most cases — as long as some healthy stems or roots remain. Even a severely overwatered plant can recover if you remove rotted roots promptly and repot into fresh, well-draining mix. Plants suffering from light deprivation, underwatering, or pest damage typically bounce back within a few weeks once conditions improve. Accurate diagnosis and quick action are the keys to success.